If your "artistic" muscle fades if you don't use it, mine is sadly shrinking during these Summer months! I just spent two days trying to get ahead of the weeds before their seeds blow in the wind, what a task!

Here's the project in the book, and on the bottom left my stone, smooth but with nice divets and swells.

The first step was to make the rough body shape and then refine it to the basic seal body... Well, we've all experienced the "ugly phase", right? It was at this stage that I almost gave up and started over. My seal did not look like a seal at all, it was most definitely a shark! How, oh how to make my overly long body more pudgy and friendly? I stabbed my needle deep in to the face and neck and compacted the wool until finally the fierce snout became a soft and rounded seal head. It's amazing how that happens, you just have to trust the process and keep working towards your goal!

Now that the body shape was established, the tail and flippers were formed. The book was a little vague on how to do this (well, it is "next level felting" so I suppose the author assumes you know how already), so to shape these items I used the same technique that I've used for animal ears or flower petals. It's best described and illustrated in Sarafina Fiber Arts' sleepy mouse tutorial.

Color was then added to the body (I used a variegated grey mini braid from The Spinning Spider) and I used pins for the nose and eye placements.
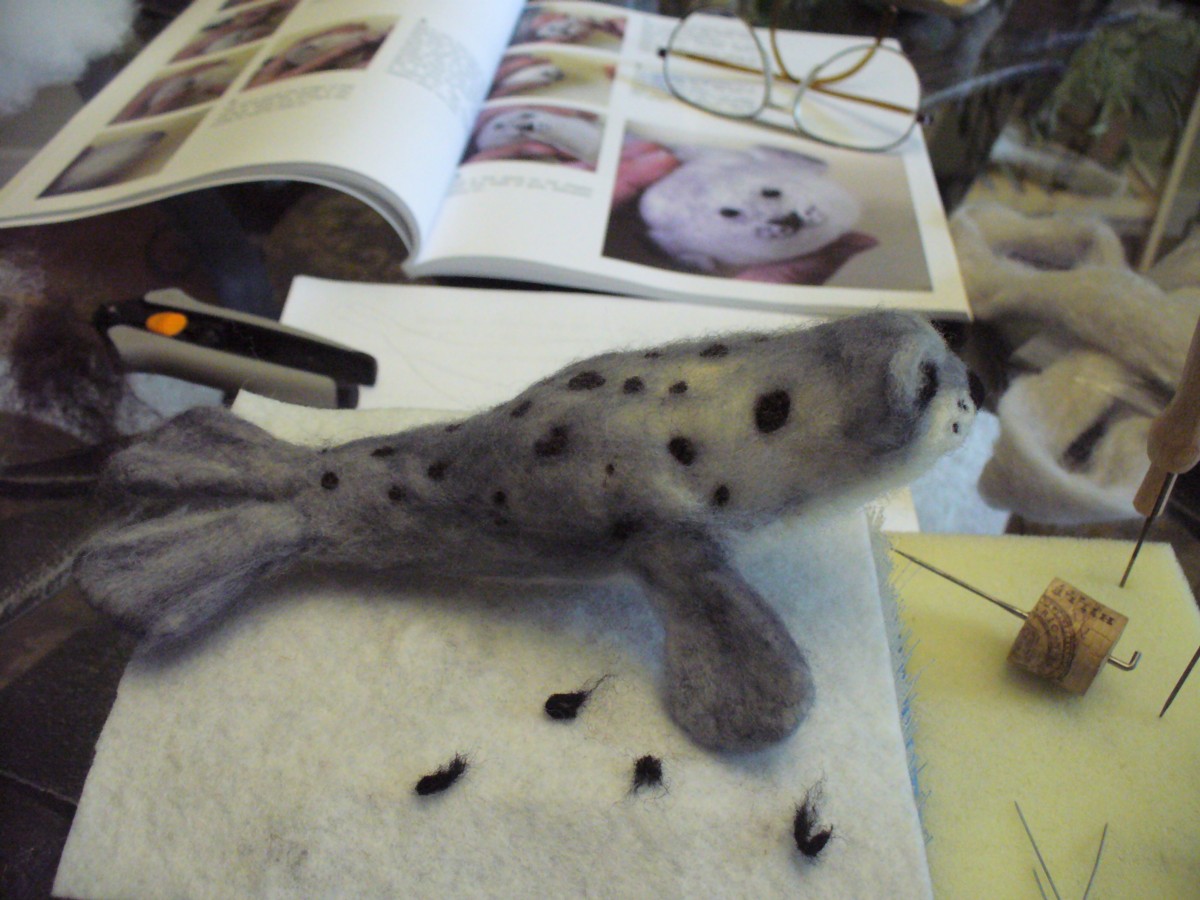
As for the face, again the technique in the book was helpful and basically the same as the dots. Learning to control small details like this feels really good! As for the face:

Here I didn't follow the example and went with my own ideas, adding an eye ridge, more color and bigger cheeks. It's at this point that my little seal took the name Shark.

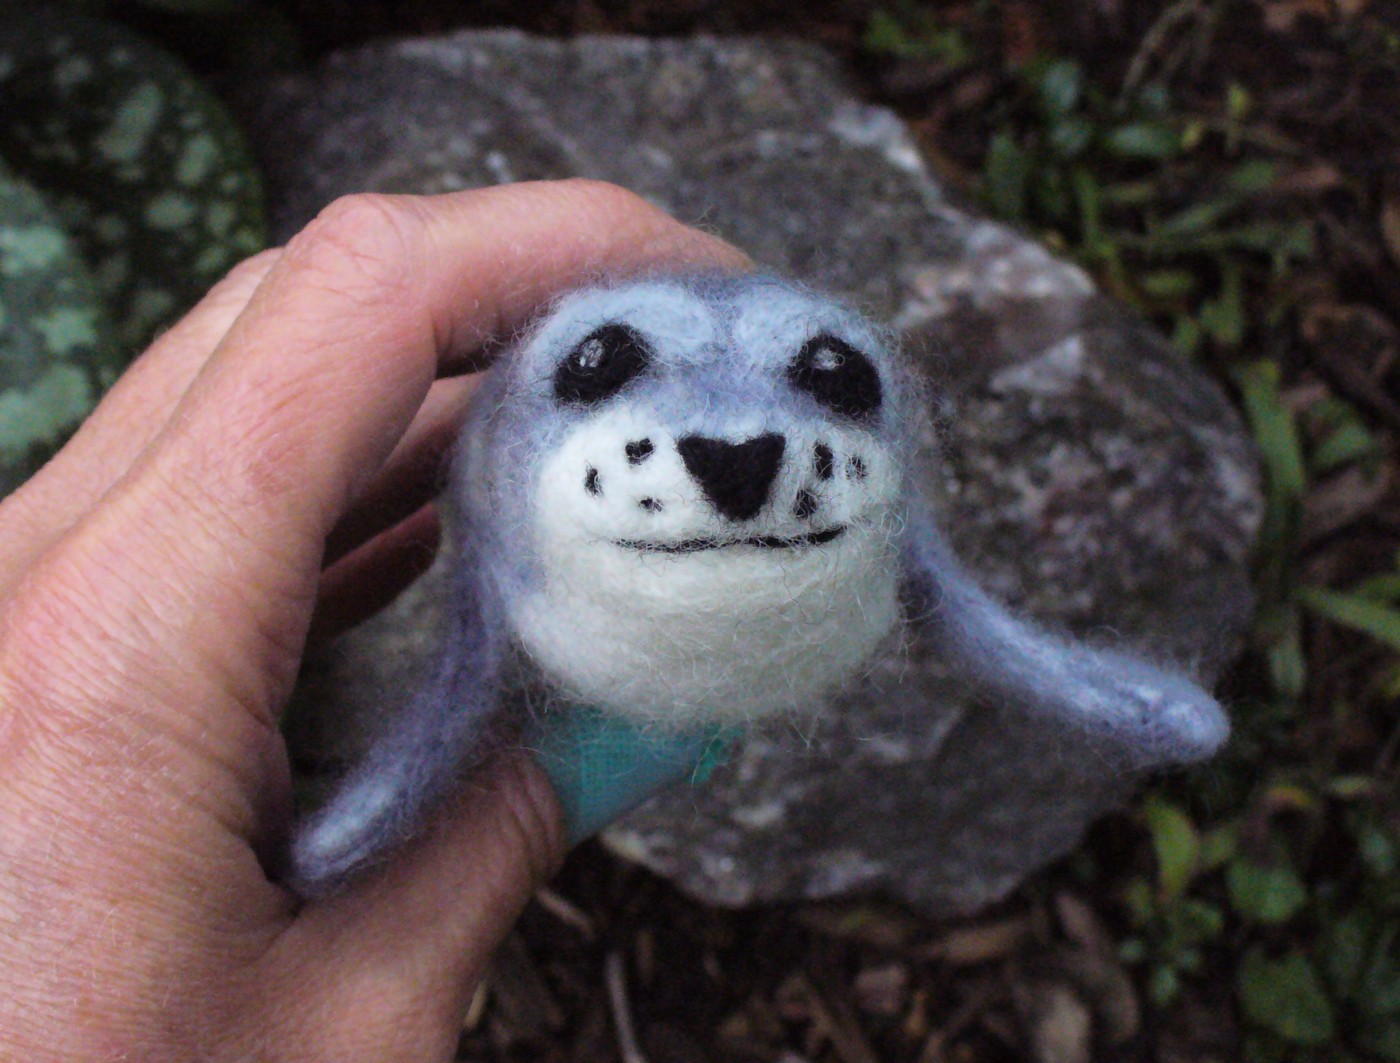


And here he is on his beach stone! Hurrah!
If I were to change anything, I'd say his flippers are a little big but otherwise I'm very happy with how he turned out.