Showing posts with label fox. Show all posts

Feb 10, 2023

Fox in a Summer Meadow

I was gifted a kit for Christmas 2021, the "2D wet felting fox in field" by Sarafina Fiber Art.  I had only completed one other 2D felting project but I loved the fox and thought I could do the kit following the Youtube videos but without wet felting as I really love the fuzzy, pet-able loose fibers.  So, in December 2022 I finally sat down with the kit and got started.  


First, I was very fortunate to have a big enough piece of foam to lay out the project, which is just shy of 24 inches by 24 inches.  This was a wedge pillow Mom tried out for a while (she found it didn't help her neck).  

All the gorgeous fibers were set out and grouped together.


Then, it was time to start!  The horizon was laid out first, separating sky from meadow. 


Once that was done, using the 2 shades of green, the meadow was laid down.


Next, the sky was filled in with only one shade of blue and blended white clouds. 

 Unfortunately, in the video tutorial, Sara makes a grey, early dawn sky while I definitely wanted a Summer blue, mid-day sky, all warm and sunny.  I blended a little where the sky meets the grass for a lighter shade. I nearly ran out of blue!


This was a fun step:  adding all the gorgeous, super soft locks!  Oh my, how to pick which ones to use and be careful not to over-do it!!  I also added a tree on the left and a grouping of sumac behind the fox.  
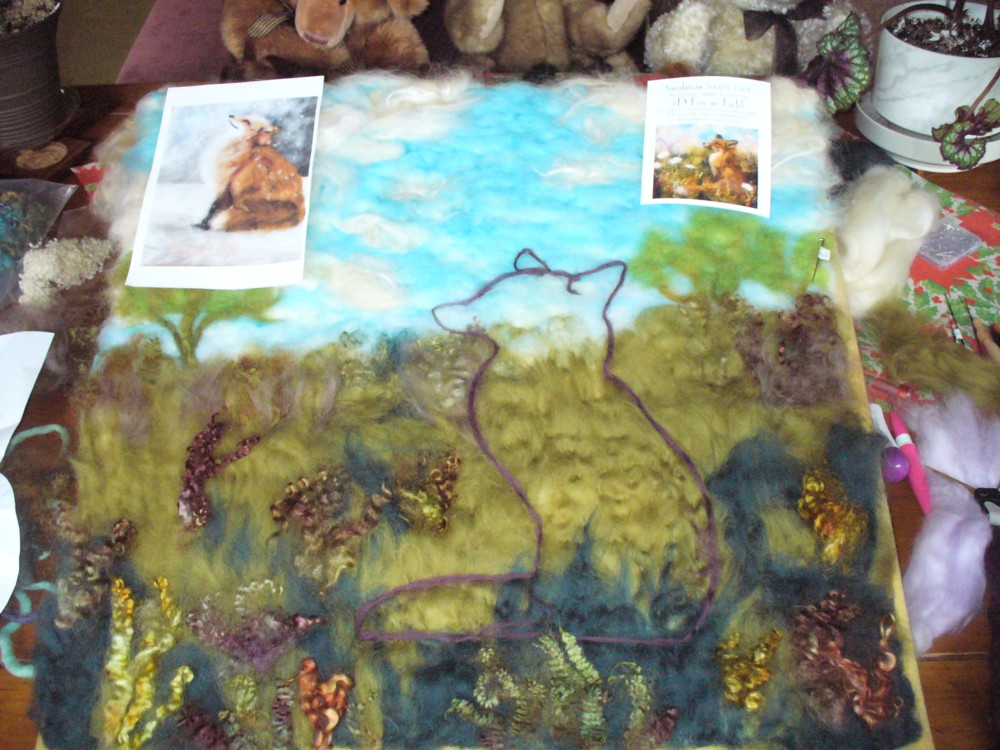


With the background more or less complete, it was time to outline the fox and remove the paper stand-in.  


This next part was tricky for me:  laying down the dark base colors for the fox.  In the tutorial, a lot of purple is used and I just didn't like the outcome.  I pulled a lot off and just left the purple on the darkest parts of the fox, as seen here.  


Now it was time to work on the fox!  But before I jumped in, I watched the tutorial and just made all the color blends and paid attention to how Sara created the fox.  This really was essential: blending by hand takes time and you really don't want to rush this process.

Once I had all my blends prepared, it was easy to follow along and voila!  All of a sudden there was a fox in my meadow!


Look at that!!!  It really is all about the colors and the "furriness"!


One of the most lovely parts of the finished picture is the Queen Anne's Lace and at this stage instructions were given on how to create these lovely flowers using little white nibs.  The nibs are then covered over with a very fine spray of white fiber which holds them in place.

Again it was a question of not over-doing it and achieving some balance.

It's at about this point in the video that the entire piece is wet felted, so I simply needle felted everything down instead in order to keep the loose, wispy look and feel. 


Next:  the eye.  I spent a lot of time on the eye.  Following the instructions almost to the letter (especially the color placement), I think I achieved a lovely fox eye, and good markings on the face.  


The grasses filled in over the fox's tail and hind end and I worked on the trees a bit.


Most importantly, I fixed the slope of his forehead.  It just didn't look right, so I looked at various photos and saw that I'd given my fox too much of an "apple" forehead and had to correct the slope.  Luckily, with the fibers still being quite loose, I was able to manipulate them to soften that slope and get a more foxy look.  


One last thing:  I added horse hair for whiskers.  Now she was finished!


A fox enjoying a sunny, Summer afternoon.


I love that tail!!


This was a really great experience, I'm so happy to have learned so much and I love the end result!  Color blending is the biggest take-away and will help me make my 3D critters look even better.  

I would certainly recommend a Sarafina kit and instructional videos.  If you're looking for a guiding hand and motivation to keep going, try one of her YouTube tutorials.
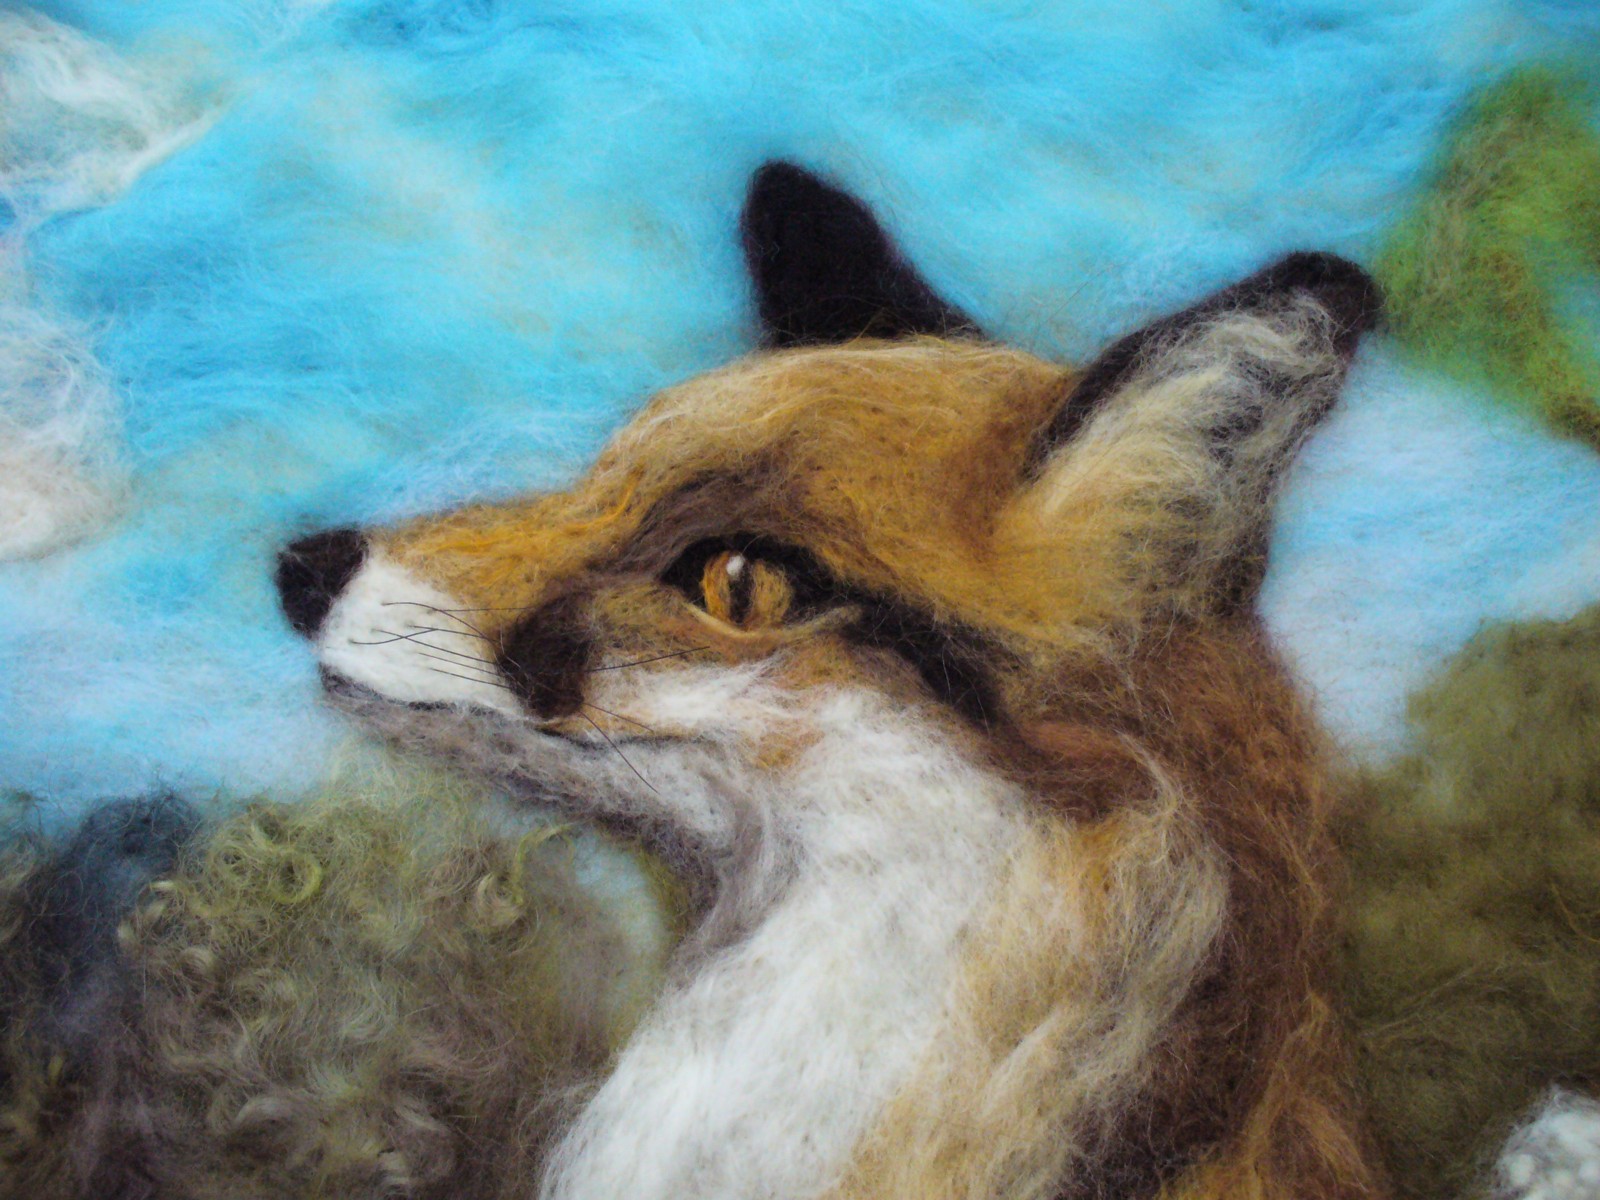

My fox is now framed in a shadow box with a hinged front so I can pet him whenever I want! 


(A word to the wise:  framing is tricky!  If you plan to frame a piece you're making, consider the size BEFORE you start!  Awkward sizes are hard to fit into store-bought frames.  Also, thrift stores are great places to find nice frames.)

Jan 5, 2021

The story of a fox

In June 2020 I ordered an intriguing needlefelting kit from Fibrecraft, a Mississauga based online business that sells a nice range of quality needlefelting supplies.  It was my first ever order from this small business and I was impressed by the entire experience, from an easy to use website, straight-forward ordering procedure, super fast delivery and well-packaged products (there was even a little extra "gift", which was a treat!).  In these COVID times when visiting a farm to buy rovings isn't possible it was nice to find a great Canadian online spot!


Fabian the Fox was just what I needed:  a challenge!  I've completed simpler critters but nothing at this level.  I was eager to get started...

First the instructions were detailed in how to create the wire armature.  Then I started to build up the core body, and then legs.  Instructions were step-by-step but I feel some experience is needed as it's not aimed at beginners.


I have to mention that the fibres were delicious to work with, so soft and felting quite easily. (And plentiful:  there was enough for the fox with some left over.)


Once the basic body was created...
It was time to work on the face.  Eye holes were created and beads inserted to hold the positions.  This was well described... but the nose?  The instructions left you to figure it out on your own.  I ended up with a rather large nose.

Then the black "mascara" was added along with the mouth and other facial markings.


Ears were made from scratch... with good instructions on how to do this.


And eyes were created from felt too!  That was an amazing feat, I thought!  I was impressed with how they turned out!  Again, though, the instructions were a little short:  how do you make smooth eyeballs?  I found it was very helpful to wet and role the eyes in my hands to get nice, smooth balls.  


The next step was not so much fun:  adding the black to the paws to build up the feet.  Because of the wire armature, there was no room to poke without hitting the wire.  I broke two needlefelting needles trying to get the black fibres to stay in place.  Also, the instructions at this phase were very short and didn't supply the necessary details on how to create the feet.  I looked online for reference images of fox feet for help.

Luckily I had other needles and could keep going...


Until they were finally done!


Now it was time to make the fox furry!  The thighs and hind quarters were done first, adding long fibres and then trimming them down to the desired length.  The chest and tummy followed and finally the tail.
The reverse needle was used at this stage.  Here the instructions were good on how to blend out lines and add just a bit of fluffiness to even out the fox's coat.


And Sabian was finished!  I think my fox is more a female then Fabian so Sabian seems to suit her.

Yes, it took me 6 months to finish her!  But there were LOTS of interruptions!


Ta da!!  
Aside from the one shortcoming in that the instructions could be a bit more thorough, I would certainly do another Chicktin Creations kit.  The unicorn looks like fun...