I was gifted a kit for Christmas 2021, the "2D wet felting fox in field" by Sarafina Fiber Art. I had only completed one other 2D felting project but I loved the fox and thought I could do the kit following the Youtube videos but without wet felting as I really love the fuzzy, pet-able loose fibers. So, in December 2022 I finally sat down with the kit and got started.

First, I was very fortunate to have a big enough piece of foam to lay out the project, which is just shy of 24 inches by 24 inches. This was a wedge pillow Mom tried out for a while (she found it didn't help her neck).
All the gorgeous fibers were set out and grouped together.

Then, it was time to start! The horizon was laid out first, separating sky from meadow.

Once that was done, using the 2 shades of green, the meadow was laid down.

Next, the sky was filled in with only one shade of blue and blended white clouds.
Unfortunately, in the video tutorial, Sara makes a grey, early dawn sky while I definitely wanted a Summer blue, mid-day sky, all warm and sunny. I blended a little where the sky meets the grass for a lighter shade. I nearly ran out of blue!

This was a fun step: adding all the gorgeous, super soft locks! Oh my, how to pick which ones to use and be careful not to over-do it!! I also added a tree on the left and a grouping of sumac behind the fox.

With the background more or less complete, it was time to outline the fox and remove the paper stand-in.

Now it was time to work on the fox! But before I jumped in, I watched the tutorial and just made all the color blends and paid attention to how Sara created the fox. This really was essential: blending by hand takes time and you really don't want to rush this process.
Once I had all my blends prepared, it was easy to follow along and voila! All of a sudden there was a fox in my meadow!

Look at that!!! It really is all about the colors and the "furriness"!

One of the most lovely parts of the finished picture is the Queen Anne's Lace and at this stage instructions were given on how to create these lovely flowers using little white nibs. The nibs are then covered over with a very fine spray of white fiber which holds them in place.
Again it was a question of not over-doing it and achieving some balance.
It's at about this point in the video that the entire piece is wet felted, so I simply needle felted everything down instead in order to keep the loose, wispy look and feel.

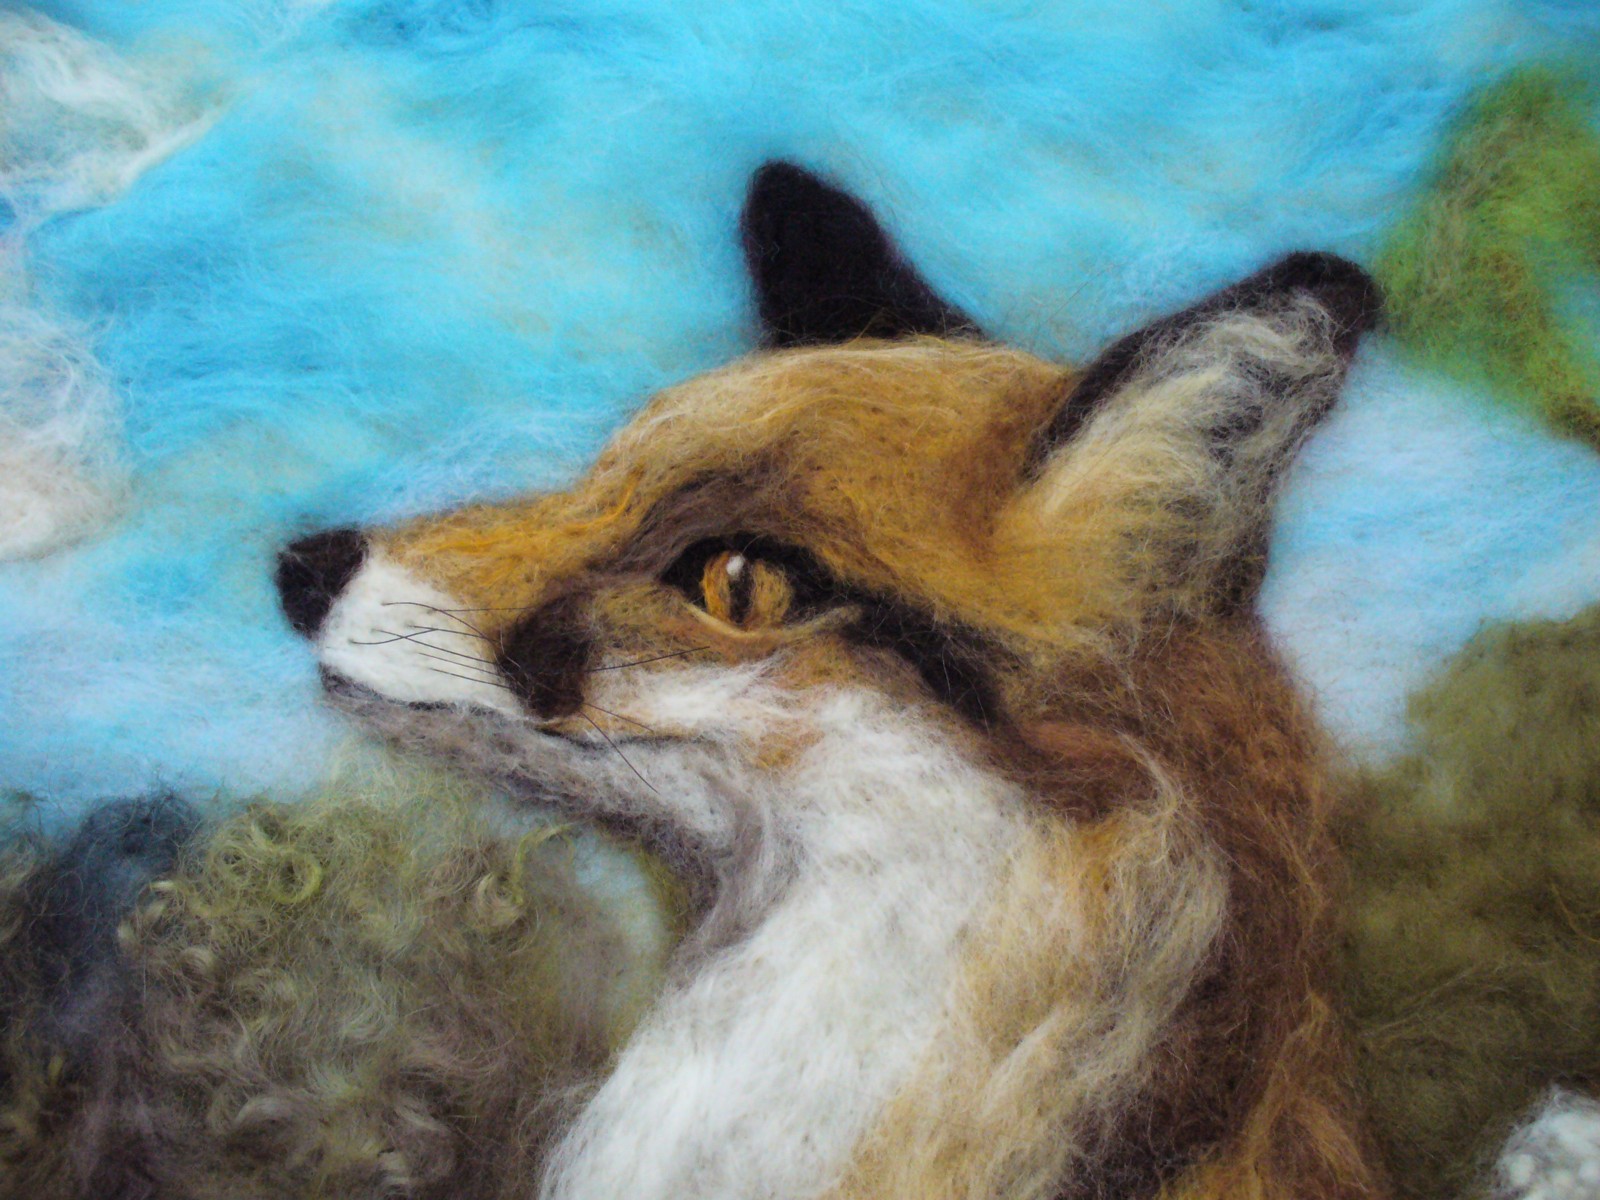
Next: the eye. I spent a lot of time on the eye. Following the instructions almost to the letter (especially the color placement), I think I achieved a lovely fox eye, and good markings on the face.

The grasses filled in over the fox's tail and hind end and I worked on the trees a bit.

Most importantly, I fixed the slope of his forehead. It just didn't look right, so I looked at various photos and saw that I'd given my fox too much of an "apple" forehead and had to correct the slope. Luckily, with the fibers still being quite loose, I was able to manipulate them to soften that slope and get a more foxy look.

One last thing: I added horse hair for whiskers. Now she was finished!

A fox enjoying a sunny, Summer afternoon.


I love that tail!!

This was a really great experience, I'm so happy to have learned so much and I love the end result! Color blending is the biggest take-away and will help me make my 3D critters look even better.
I would certainly recommend a Sarafina kit and instructional videos. If you're looking for a guiding hand and motivation to keep going, try one of her YouTube tutorials.
My fox is now framed in a shadow box with a hinged front so I can pet him whenever I want!

No comments:
Post a Comment